TABLE OF CONTENT
We assume that you either use an iPhone or an iPad or at least have used it once in your lifetime. If you have laid your hands on these amazing mobile devices, you surely know the seamless butter-like experience that you have obtained. All the applications available for Android that have an iPhone version of it will feel like an upgrade to it. If you want to create such apps in this amazing Apple ecosystem, Xcode will get you started.
Understanding Xcode, Apple’s development tool, is crucial because iOS apps play a significant role in our digital lives. They enhance productivity, entertainment, and communication. With the iOS market continually growing, having the skills to develop these apps opens doors to exciting opportunities. In this article, we’ll walk you through the basics of Xcode, making it easy for both beginners and experienced developers to grasp. By the end, you’ll be equipped to start your iOS app development journey and contribute to the ever-evolving world of mobile technology. Let’s get down to brass tacks!
What is Xcode and Why is it Essential?
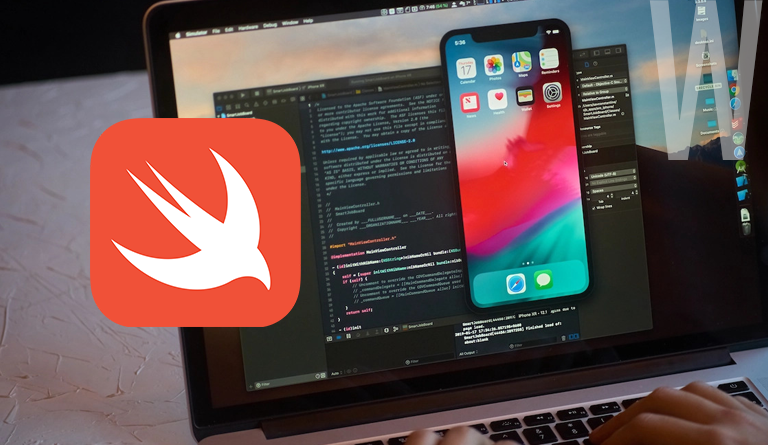
Xcode is Apple’s native integrated development environment (IDE) that is available to Apple users for free. It serves as a one-stop solution for designing, developing, and publishing applications across various Apple platforms, including iOS, iPadOS, tvOS, watchOS, and macOS. Furthermore, Xcode supports a wide range of programming languages, such as Swift, Objective-C, Objective-C++, C, C++, Java, Python, and more.
One of Xcode’s most significant roles is as the official tool for creating and submitting applications to the Apple App Store. This means that any developer looking to publish an app on Apple’s platform must use Xcode. The importance of Xcode in iOS app development lies in its role as the primary and officially supported IDE for Apple’s ecosystem. It provides developers with the necessary tools and resources to create high-quality, native applications that can reach millions of users through the App Store.
How to get started with Xcode?
To get started with Xcode, you’ll need to install it, set up your development environment, and become familiar with its features. Here’s a step-by-step guide on how to do just that:
1. Basic Requirements:
Ensure that your Mac meets the basic requirements for running Xcode, which typically include:
- A Mac running macOS 11 or later.
- At least 4GB of RAM (8GB or more recommended).
- A minimum of 8GB of free storage space, as Xcode requires a significant amount of storage.
Note: A compatible Mac model (e.g., MacBook, iMac, or Mac mini, usually from 2013 or later).
2. Install Xcode:
You can install Xcode from the Mac App Store or download it from the Apple Developer website. Here are the steps:
– Via Mac App Store:
- Open the App Store application.
- Sign in with your Apple ID.
- Search for “Xcode” in the App Store.
- Click the “Get” button to download and install Xcode.
– Via Apple Developer Website:
- If you have an Apple Developer account, you can download Xcode from the Apple Developer website.
- Go to the Apple Developer website (developer.apple.com) and sign in with your developer account.
- Navigate to the “Downloads” section and find Xcode. Download the latest version available.
3. Install Xcode’s Command Line Tools:
Xcode’s Command Line Tools are essential for software development. Install theses tools by following these steps:
- Open the Terminal application on your Mac.
- Run the command xcode-select –install.
- A prompt will appear, asking if you want to install the Command Line Tools. Click “Install” to begin the download and installation process.
- You will receive a confirmation message as soon as you complete the installation.
- You can verify the installation status by running xcode-select -p in the Terminal.
- Additionally, make sure to select Command Line Tools from Xcode’s preferences (Settings -> Locations).
4. Create a New Project:
- Open Xcode.
- Click on “File” in the menu bar and select “New” > “Project.”
- Choose a template that matches your project type, such as “iOS App,” “macOS App,” or others.
- Follow the wizard to configure your project settings, including its name, organization, and other details.
5. Develop Your App:
- Xcode provides a user-friendly interface for coding, designing user interfaces, and testing your app.
- Write your code using Swift, Objective-C, or other supported languages.
- Design your app’s user interface using Interface Builder or SwiftUI.
- Use Xcode’s debugging and testing tools to find and fix issues in your code.
6. Build and Run:
- After writing code, you can build and run your app on the iOS Simulator or a physical device.
- Click the “Run” button (a play icon) in Xcode to compile and launch your app.
7. Learn and Explore:
- Xcode offers a wide range of features, including documentation, code snippets, and tutorials.
- Explore Xcode’s documentation and online resources to learn more about iOS/macOS development.
That’s the basic overview of how to get started with Xcode. As you progress in your development journey, you’ll become more familiar with its features and capabilities, helping you create amazing apps for Apple’s platforms.
Running Xcode on Windows: Is it Possible?
Many people wonder whether it’s possible to run Xcode on a Windows PC. The short answer is no. Xcode is totally designed for macOS and cannot be installed on Windows with the above said steps. However, there are alternative methods for Windows users who want to develop iOS applications:
1. Use a Virtual Machine:
- One common approach is to set up a macOS virtual machine on your Windows PC using software like VirtualBox.
- Once the virtual machine is set up, you can download and install Xcode from the Apple Store within the macOS environment.
2. Hackintosh:
- Another option is to create a Hackintosh, which is a non-Mac machine modified to run macOS. While similar to virtual machines, Hackintosh installations involve a separate hard drive for macOS.
- This approach can be complex and may encounter compatibility issues.
3. MacinCloud:
- MacinCloud offers a unique solution where you can rent a remote Mac in the cloud. This allows you to develop iOS apps on a Mac remotely from your Windows PC.
- The drawback here is that it relies heavily on internet connectivity.
Requirements for Installing Xcode on Windows:
- Virtualization software like VMware or VirtualBox (VirtualBox is often recommended).
- A licensed copy of Xcode, which can be downloaded from the Apple website.
- Adequate virtualization hardware on your PC.
- A dual-core Intel processor.
- An Apple ID to access the Apple Store. Developers may also need an Apple Developer ID.
- At least 2GB of RAM (more is recommended).
Steps for Installing Xcode on Windows
Here’s a summarized guide for installing Xcode on Windows:
- Install virtualization software (e.g., VMware).
- Download and install the OS X Mavericks ISO file.
- Next, proceed and create a new virtual machine with the virtualization software.
- Personalize the virtual machine settings, including RAM allocation.
- Create a virtual hard drive file.
- Load the ISO file image.
- Log in to the Apple Store using your Apple ID within the virtual machine.
- Search for and download Xcode.
- Enter your credentials during Xcode installation.
- Once installed, Xcode is ready for use on your Windows system.
Keep in mind that these steps provide a workaround for running Xcode on Windows, but the experience may not be as seamless as using a Mac. Additionally, be aware of the legal and technical challenges involved in these methods, and consider them carefully before proceeding
Advantages of Xcode
Integrated Development Environment (IDE): Xcode provides a comprehensive IDE that includes a code editor, debugging tools, interface builder, and other development utilities in one package.
Swift and Objective-C Support: Xcode supports multiple programming languages, including Swift and Objective-C, which are the primary languages for iOS and macOS app development. Developers have the flexibility to choose the language that best suits their project.
Interface Builder: Xcode’s Interface Builder makes it easy to design user interfaces visually. You can drag and drop UI elements, set constraints, and preview how your app will look on different Apple devices.
Performance Analysis: Xcode includes powerful performance analysis tools that help developers identify bottlenecks, memory leaks, and other performance issues in their apps. This can lead to improved app responsiveness and efficiency.
iOS Simulator: Xcode provides an iOS Simulator that allows developers to test their apps on virtual iOS devices. This is especially useful for testing on various screen sizes and device configurations without needing physical hardware.
Disadvantages of Xcode
Platform Limitation: Xcode is exclusive to macOS, which means you can only develop iOS, macOS, watchOS, and tvOS apps on a Mac. This limitation can be a barrier for developers who prefer other operating systems.
Steep Learning Curve: While Xcode offers a wealth of features, it can be complex for beginners. Learning to navigate its interface and mastering all its tools may take time and effort.
Resource Intensive: Xcode can be resource-intensive, especially for larger projects. It requires a Mac with a decent amount of RAM and storage space. This can be a drawback for developers with older or less powerful Macs.
Despite these disadvantages, Xcode remains the primary choice for Apple app development due to its amazing features, integration with Apple’s ecosystem, and official support for app submission to the App Store.
Key Takeaways
Xcode is Apple’s native IDE for iOS app development, offering an all-in-one solution for creating high-quality applications.
Xcode supports programming languages like Swift and Objective-C, giving developers flexibility in choosing the right language for their projects.
With its visual interface builder and performance analysis tools, Xcode simplifies app development and enhances productivity.
Xcode is exclusively available on macOS, limiting app development to Mac users.
Wrapping Up
Xcode stands as a vital tool in the world of iOS and macOS app development, offering a seamless and integrated experience for developers. Its marvelous features, including an integrated development environment, support for Swift and Objective-C, and a visual interface builder, make it an indispensable choice for creating high-quality applications across Apple’s diverse ecosystem. The power of Xcode lies not only in its ability to simplify the development process but also in its role as the official gateway to the Apple App Store, where millions of users can discover and benefit from the apps you create.
As a leading mobile app development company, W2S Solutions specializes in iOS app development, delivering app development services tailored to your unique business needs. With a team of experienced developers well-versed in Xcode and the Apple ecosystem, we bring your app ideas to life, ensuring they meet the highest standards of quality, performance, and user experience. Partner with us to embark on a journey of innovation and success in the world of iOS app development. Your vision and our expertise together can create exceptional apps that make a difference.
Frequently Asked Questions
xcode-select --install to install command-line tools needed for compiling and managing software.Get inspired!
Subscribe to our newsletter and get updates on how to navigate through disruption and make digital work for your business!